Saturday, 12 May 2012

Thursday, 10 May 2012
Evaluation 6 - Skills Learnt about Technologies
To ensure that our final product could be made, there were several different software's and technologies we needed to use. These were:
- Final Cut Express
- Livetype
- Blogger
- Prezi
- Digital Cameras
- Microphones
- Red Head Lighting Kit
- Youtube
 Final Cut Express was the main software that we used to put our whole project together. This software was used to put the actual sequence together, which included all of the sound and credits. To begin with, this software seemed quite complicated, as I hadn't had much experience and there was a large amount of different tools available. As the task went on more became clear, and I was able to use Final Cut Express quickly as I understood what was what. 'Cross Cutting' 'Additive Fade' and 'Colour Corrector' were the main editing techniques myself and the group used, but from Final Cut we were able to import sound effects and credits previously made. Below are some screen shots of the sequence in Final Cut.

 It was essential that we had a secure place in which all of our planning/research and evaluation tasks were able to be saved. Before starting the subject, I hadn't used Blogger or Prezi before, therefore I had to sign up to both of these software's. From blogger I made a blog (where we were able to embed presentations made from Prezi) which i kept updating throughout the project. Prezi was used for the powerpoints as a different way to display information, which then got uploaded to my blog. I found both of these software's really useful.
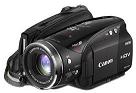 Throughout our group we all had a basic understanding of how to use the digital camera (examples such as record,stop,playback, zoom in/out). I feel however, my skills have developed significantly as I began to use the different camera angles. We also had a microphone available, this was to record specific sound effects which we wanted, for example after we had put together our opening sequence we agreed that a sound effect to go with the girl being tied up in the shed would work well. We therefore used the microphone to capture this sound. Lastly, Red Head Lighting Kit was used to improve the lighting of one of the shots - when we originally filmed it the picture came out too dark, so by using additional lighting we were able to focus it where it was needed.
- Final Cut Express
- Livetype
- Blogger
- Prezi
- Digital Cameras
- Microphones
- Red Head Lighting Kit
- Youtube
Final Cut Express was the main software that we used to put our whole project together. This software was used to put the actual sequence together, which included all of the sound and credits. To begin with, this software seemed quite complicated, as I hadn't had much experience and there was a large amount of different tools available. As the task went on more became clear, and I was able to use Final Cut Express quickly as I understood what was what. 'Cross Cutting' 'Additive Fade' and 'Colour Corrector' were the main editing techniques myself and the group used, but from Final Cut we were able to import sound effects and credits previously made. Below are some screen shots of the sequence in Final Cut.
To help produce our tital credtis, which was featured throughout our opening sequence, we needed to use LiveType. We had a lesson shown to us before we started our task on how to use the programme effectively. From that, we went then onto making the credits for our opening sequence. At first it seemed quite difficult as we weren't used to the software or able to use it to the best of our ability, but shortly after we practiced and changed a few things around it seemed quite straightforward.
 Throughout our group we all had a basic understanding of how to use the digital camera (examples such as record,stop,playback, zoom in/out). I feel however, my skills have developed significantly as I began to use the different camera angles. We also had a microphone available, this was to record specific sound effects which we wanted, for example after we had put together our opening sequence we agreed that a sound effect to go with the girl being tied up in the shed would work well. We therefore used the microphone to capture this sound. Lastly, Red Head Lighting Kit was used to improve the lighting of one of the shots - when we originally filmed it the picture came out too dark, so by using additional lighting we were able to focus it where it was needed.
Overall, throughout the project I feel my knowledge on these software's and technologies has considerably improved. I understand why they are a popular choice for film makers as they can really improve a sequence to make it look as real as possible. From starting off quite confused when using these technologies, to understanding exactly what I'm doing, is a big improvement.
Monday, 7 May 2012
Sunday, 6 May 2012
Saturday, 5 May 2012
Friday, 4 May 2012
Evaluation 2 - Media Product Representing Social Groups
What social groups appear in your opening sequence?
In our opening sequence we used a young teenage girl. The original plan was to include a grown man also, this would have been an additional social group - but when it came down to it, we believed that it created more suspense leaving the man out of the audiences view. We therefore resulted in using only this young girl.
What is the stereotypical representation of these social groups?
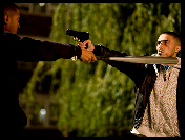
There is usually a stereotypical view of a teenager, and this representation of them is often shown within films. In some films, teenagers will be shown as aggressive, lazy, criminals and most likely to be involved in violent behaviour, as the image to the left demonstrates (Kidulthood).
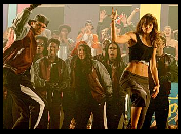
You will watch them partying, out with friends and having a good time, or controversially sleeping around the house, not moving from the sofa all day. Teenagers are related to as having 'attitude', no manners and are constantly swearing (whilst smoking and drinking!). This image shows teenagers partying in the film 'Step Up'.
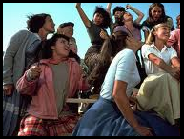
However, the representation of girls is different. Girls are seen to be innocent, vulnerable and 'dependent' on others. But also 'girly' and very neat with their appearance. Although some films do go against this ,most of the time this is the way a young female will be represented. In the film 'Grease' and they show girls all depending on each other.
Our opening sequence has represented teenagers in an unconventional way, although our character used is a young teenager she still goes against the associated stereotype. We do not see her partying, participating in criminal activity or ultimately sleeping. But instead we see her as being vulnerable and the victim. The camera angles I think play the main part in demonstrating this, both times the girl comes on screen, we see her tied up. We agreed to use a low-angle shot as this shows that she is uncomfortable with the situation but also inferior to whoever has tied her up. This goes against the stereotypical view of a teenager, and therefore we have represented her in an unconventional way. However, a girl being tied up does promote the stereotype of girls as it shows her to be weak, therefore in this sense a victim, so our opening sequence does suggest some type of conventional representation.
Why have you chosen to represent them in an unconventional way?
I think by choosing to represent the teenager unconventionally it makes the opening sequence more interesting. The audience may not understand what is going on but at the same time want to watch on to find out - narrative enigma. The audience may at first find it hard to identify with the character, but by the sound effects of her whimpering in the background, towards the end of the sequence they start to understand the situation of her being tied up. By not following the stereotype of a ‘dangerous and out-of-hand’ teenager, I think the audience would want to watch on to find out the rest of the storyline.
Thursday, 3 May 2012
Director's Commentary
Below is a clip showing you the directors commentary about our opening sequence.
Wednesday, 2 May 2012
Tuesday, 1 May 2012
Music Evaluation
The music we used in our opening sequence is very classical and eery. It gives the opening sequence an uncomfortable feeling and it creates tension within the audience. It is a contrapuntal sound because it is relaxing and calm however what we are seeing is creepy and chilling. I feel this is a good technique because it gives off a daunting feeling creating narrative-enigma leaving the audience wanting to watch on, but scared at the same time. Below is the music we used for our opening sequence.
Friday, 20 April 2012
Production Blog 5
WHAT WAS TRICKY/EASY OVERALL?
Throughout the whole project I wouldn’t say that any particular task has been ‘easy’. However we managed to solve problems that occurred with the filming, editing and time managing quite quickly. In my opinion the written side of the coursework has been the more straightforward task; this is because I personally prefer to write about things rather than talk to a camera.
During the filming, at certain points it was quite frustrating. Sometimes the shots that I had in mind weren’t as easy as which I originally thought and therefore we had to compromise with this. The editing process was also tricky, this was down to the fact there were so many different editing techniques available for us to use we had to choose the most suitable one for our genre without making it seem to ‘cheesy’. However, with the many options to choose from I believe we picked out the most convenient.
Therefore, overall I believe there wasn’t any task that I could consider easy although I favoured some more than others. However, in saying this I am satisfied with the work I produced both the written and filming tasks.
Throughout the whole project I wouldn’t say that any particular task has been ‘easy’. However we managed to solve problems that occurred with the filming, editing and time managing quite quickly. In my opinion the written side of the coursework has been the more straightforward task; this is because I personally prefer to write about things rather than talk to a camera.
During the filming, at certain points it was quite frustrating. Sometimes the shots that I had in mind weren’t as easy as which I originally thought and therefore we had to compromise with this. The editing process was also tricky, this was down to the fact there were so many different editing techniques available for us to use we had to choose the most suitable one for our genre without making it seem to ‘cheesy’. However, with the many options to choose from I believe we picked out the most convenient.
Therefore, overall I believe there wasn’t any task that I could consider easy although I favoured some more than others. However, in saying this I am satisfied with the work I produced both the written and filming tasks.
Thursday, 19 April 2012
Production Blog 4
HOW WE GOT THE SHOTS WE WANTED:
After our preliminary task, we filmed some more test shots. This allowed us to practice with the camera and therefore get the different angles which we wanted in our final piece. After the first filming day, we wasn’t completely satisfied with the shots we had filmed, therefore before we done any more filming for the next three days we just practiced with the camera, and filmed some shots around school. For example we filmed a close-up of a knife cutting – so we were able to make it perfect for the real shot of the steak being cut. Below is a screen shot of the practice shot and then the final shot used.
After our preliminary task, we filmed some more test shots. This allowed us to practice with the camera and therefore get the different angles which we wanted in our final piece. After the first filming day, we wasn’t completely satisfied with the shots we had filmed, therefore before we done any more filming for the next three days we just practiced with the camera, and filmed some shots around school. For example we filmed a close-up of a knife cutting – so we were able to make it perfect for the real shot of the steak being cut. Below is a screen shot of the practice shot and then the final shot used.

Wednesday, 18 April 2012
Production Blog 3
WORKING AS A GROUP:
At the start of the media production we all worked well as a team and each of us contributed our own ideas. We ensured that all of the research and planning tasks were finished on time, and that each of us had them posted onto our blogs.
When it came down to the editing after half term, Charlie had gone on holiday. So it was only Danielle and myself who was able to edit, we spent almost every free lesson editing the sequence, finding suitable music and adding sound effects. We managed together to get the sequence finished and completed to a standard which we were happy with.
When it came down to the group evaluations, we decided to answer these individually. This was because one of our group members had contributed little to the whole task and therefore wouldn’t have had much to say about what had gone well. With Charlie still on holiday, questions associated with the editing side of the task could only be answered by me or Danielle. To save confusion we simply just decided to fill these in by ourselves.
Overall, as a group I don’t think our teamwork was brilliant. Although at times we worked well together, I do think there were certain areas that could be improved. However, I am happy with the final product so I don’t think this is a major issue.When it came down to the filming, the whole group was present on the first day. We managed to get some shots, but when we played it back, we decided we wanted to change the layout of the table – so we could no longer use these shots. On the second filming day I wasn’t present as I was working, Danielle and Charlie filmed some more shots and this was the beginning of the sequence coming together. From then on I, Charlie and Danielle attended every other filming day.
At the start of the media production we all worked well as a team and each of us contributed our own ideas. We ensured that all of the research and planning tasks were finished on time, and that each of us had them posted onto our blogs.
When it came down to the editing after half term, Charlie had gone on holiday. So it was only Danielle and myself who was able to edit, we spent almost every free lesson editing the sequence, finding suitable music and adding sound effects. We managed together to get the sequence finished and completed to a standard which we were happy with.
When it came down to the group evaluations, we decided to answer these individually. This was because one of our group members had contributed little to the whole task and therefore wouldn’t have had much to say about what had gone well. With Charlie still on holiday, questions associated with the editing side of the task could only be answered by me or Danielle. To save confusion we simply just decided to fill these in by ourselves.
Overall, as a group I don’t think our teamwork was brilliant. Although at times we worked well together, I do think there were certain areas that could be improved. However, I am happy with the final product so I don’t think this is a major issue.When it came down to the filming, the whole group was present on the first day. We managed to get some shots, but when we played it back, we decided we wanted to change the layout of the table – so we could no longer use these shots. On the second filming day I wasn’t present as I was working, Danielle and Charlie filmed some more shots and this was the beginning of the sequence coming together. From then on I, Charlie and Danielle attended every other filming day.
Tuesday, 17 April 2012
Production Blog 2
TIME MANAGEMENT:
To begin with we didn't have any real planned time where we were to go out and film, as a result our time management to start was weak. For example - when our research and planning work had been accomplished, we wasn't taking the filming as seriously as what we should have done and therefore when it came down to it we were rushing trying to reach our deadline.
It was only when we realised how quick time was going that we sat down and made a plan about what days and what times the group as a whole were available to film - this was successful as we were able to meet our deadline with a good piece of finished work.
We spent many lessons and free time concentrating on the credits for the titles rather than actually getting the filming for our sequence finished. This is an additional example as to how our time keeping wasn't very good to begin with, however once the credits were completed we were happy with the result and this therefore meant we were able to put all of our focus into the filming.
Luckily for our group we had half term a week before our project needed to be in. This was a helpful thing for our group as it meant we could spend a lot of time putting the finished sequence together. When we returned to school after half term, the last week meant editing – and a lot of it! I and my group member Danielle spent a lot of free lessons on Final Cut editing the final sequence.
Overall, I think throughout the task our time management progressed, this was after we realised how little time we had left and how much work we had to do. But after we recognised this we were able to control our time efficiently and consequently reach all of the deadlines required.
To begin with we didn't have any real planned time where we were to go out and film, as a result our time management to start was weak. For example - when our research and planning work had been accomplished, we wasn't taking the filming as seriously as what we should have done and therefore when it came down to it we were rushing trying to reach our deadline.
It was only when we realised how quick time was going that we sat down and made a plan about what days and what times the group as a whole were available to film - this was successful as we were able to meet our deadline with a good piece of finished work.
We spent many lessons and free time concentrating on the credits for the titles rather than actually getting the filming for our sequence finished. This is an additional example as to how our time keeping wasn't very good to begin with, however once the credits were completed we were happy with the result and this therefore meant we were able to put all of our focus into the filming.
Luckily for our group we had half term a week before our project needed to be in. This was a helpful thing for our group as it meant we could spend a lot of time putting the finished sequence together. When we returned to school after half term, the last week meant editing – and a lot of it! I and my group member Danielle spent a lot of free lessons on Final Cut editing the final sequence.
Overall, I think throughout the task our time management progressed, this was after we realised how little time we had left and how much work we had to do. But after we recognised this we were able to control our time efficiently and consequently reach all of the deadlines required.
Monday, 16 April 2012
Production Blog 1
PROBLEMS WITH FILMING:
Before we started filming we never understood how complicated it would be to get all the shots that we required without giving too much away and getting the background of the location included. The first day that we started to film, we had each of our props ready and laid out how we wanted - our dinner was pasta bake. After looking back at the camera shots and what we filmed we agreed that this particular meal wasn't suitable, so we changed it to a steak (the idea of the blood) and we re-filmed.
The second day, in which we went to film, the camera battery ran out. Like planned, we returned to school the following day and re-charged the battery, but also took with us a spare one. However, we missed out on a day of essential filming therefore we had to make the time up and work hard on the weekend.
A further problem what we had was the lighting. For the scene to look romantic we needed to turn off all the main lights and make use of the light from the candles. We filmed the scene but when we played it back it still wasn't as light as what we intended it to be. We therefore came into school and took back with us a red head lighting kit, the shutters on this light allowed us to direct the light specifically where we needed it to be and this made the whole scene look so much better when we filmed it again.
PROBLEMS WITH EDITING:
Fortunately the editing for our sequence was quite simple. The whole idea of our sequence was not to be continuous, we wanted the audience to feel uneasy and in a way confused as to what was going on so we kept jumping back and forth from the meal to the girl tied up. However, one problem that did frequently occur was figuring out the best way to link the shots together. Cross dissolve, and additive dissolve were eventually the main two editing techniques that we used for the shots.
Friday, 13 April 2012
Thursday, 12 April 2012
Research into Film Companies
As one of my research tasks I decided to research and find out more about individual film companies. I included some background information about their production and examples of the films which they have produced. I chose three of the most famous film companies and these were: Universal Studios, Dreamworks and Paramount Pictures.
Universal studios is celebrating its 100th anniversary this year, it is one of the leading film companies around the world and although it is based in California it is known worldwide. Surprisingly, it is the second oldest movie studio in the world that is still in continuous production. Universal Pictures is the longest-lived Hollywood studio.
Below are examples of some of the films Universal Studios have produced:


Dreamworks is an American film studio which began in 1994. It has produced and distributed more than 10 films with box-office grosses, which totals more than $100 million each. Its founders were Steven Spielberg, Jefferey Katzenburg and David Geffen and they decided to come together following Katzenburgs resignation from the Walt Disney Company. The first film the company released was in 1998, and since then thousands have been distributed. Below are examples of the films Dreamworks have produced:


Paramount Pictures was founded in 1912 and also like Universal Studios is celebrating its 100th anniversary this year. It is one of the largest movie studios known and the last to exist in the Hollywood district of L.A, aswell as being the third oldest film studio. Below are some examples of films that Paramount Pictures have produced:


Universal studios is celebrating its 100th anniversary this year, it is one of the leading film companies around the world and although it is based in California it is known worldwide. Surprisingly, it is the second oldest movie studio in the world that is still in continuous production. Universal Pictures is the longest-lived Hollywood studio.
Below are examples of some of the films Universal Studios have produced:
Dreamworks is an American film studio which began in 1994. It has produced and distributed more than 10 films with box-office grosses, which totals more than $100 million each. Its founders were Steven Spielberg, Jefferey Katzenburg and David Geffen and they decided to come together following Katzenburgs resignation from the Walt Disney Company. The first film the company released was in 1998, and since then thousands have been distributed. Below are examples of the films Dreamworks have produced:

Paramount Pictures was founded in 1912 and also like Universal Studios is celebrating its 100th anniversary this year. It is one of the largest movie studios known and the last to exist in the Hollywood district of L.A, aswell as being the third oldest film studio. Below are some examples of films that Paramount Pictures have produced:
LiveType Trials
Throughout our lessons we have began to focus on the production logo, which we are going to apply to commence our opening sequence. We have experimented with LiveType and thought out different ways in how we are going to present it. We initially made a production logo, but at a later date we decided to change it. Here are screen shots of our first idea and then our changed and final idea.
INITIAL IDEA:

We used black and white as basic theme colours; this was because we wanted the logo to relate to our genre. We thought of the name ‘Dash Productions’ and to start the logo, each letter glows white until both of the words are highlighted. We purposely did this so the audience could focus on one letter at a time.

After all the letters had been highlighted, we added a shake effect to the writing. This was to create an unstable and jolty atmosphere for the audience, so even before they the opening sequence had started, already they recognise the genre. It also emphasises the name of our logo, so for future reference (if the logo was genuinely real) the audience would keep in mind the genre it is associated with.

Once the shaking and the glowing was over, the words along with the clapperboard would fade out. This was to inform the audience that the film was about to begin. It would become unsettling for the audience, as they wouldn’t know what to expect next (in the dark wondering if something unexpected was going to 'jump' out at them).
SECOND AND FINAL IDEA:

We decided to slightly alter our first idea. Therefore to welcome each letter we highlighted it in red, whilst landing on the clapperboard one at a time. We agreed this would have a better effect for the reason that the colour red was one of the motifs for our genre. Also with the colour being quite bold, it stands out further from the background, grabbing attention more.

Again, instead of using this as our first shot we decided to change it to our second. After the red has highlighted each letter they turn white - and that’s when the writing starts to fade off screen. We thought this was necessary, as adding more effects will make our production logo more unique.

Finally, we decided to keep the last effect matching, yet again each letter fades out along with the clapperboard, indicating to the audience that the film is going to begin.
Although we did try out and practice with other effects, we agreed to keep this as our final logo. This was because we didn’t want it to be too cliché or predictable, but we thought was detailed enough.Live type practice
This is a brief clip which myself and the group prepared, this was to run through not only the skills with the camera but similarly to experiment on the programme ‘Live Type’. The idea was to practice with the programme in order to be able to eventually use it for my final opening sequence, this included working out how to insert titles and effects to the clip. From this I gained a better understanding on how to work with Live Type but in addition, more experience with the camera and the different angles which I am able to use.
Subscribe to:
Posts (Atom)